Table of Contents
WooCommerce shipping methods dictate how products will be delivered to customers after they complete a purchase from your online store. Learn how shipping methods work and how to properly set them up using the inbuilt settings and with the help of simple-to-use shipping plugins.

Key Takeaways
- The default WooCommerce shipping methods are flat rate, free shipping, and local pickup. Each method serves a unique purpose: flat rate simplifies cost calculation, free shipping drives conversions, and local pickup supports businesses that offer hybrid online-offline fulfillment.
- WooCommerce shipping comprises shipping zones, methods, and classes. Shipping zones define where your business ships to, shipping methods define how your business ships, and shipping classes help group products with similar shipping needs. How you configure them determines the options and rates customers are shown during the checkout flow.
- The default WooCommerce shipping methods are pretty limited for growing stores. For instance, the in-built flat rate settings lack the flexibility to add product-specific logic, weight-based thresholds, or role-based rules.
- Growing businesses, stores that ship internationally, manage multiple warehouses, sell through multiple vendors, or need conditional rules, need to go beyond WooCommerce’s defaults.
- WooCommerce shipping plugins like The Dotstore’s Flat Rate Shipping Plugin For WooCommerce, Hide Shipping Method For WooCommerce, WooCommerce Multi-Vendor Shipping Addon, and Advanced USPS Shipping Plugin for WooCommerce bypass the limitations of the default shipping methods, upgrade the available shipping options, and provide a simpler interface to configure shipping settings.
Do you want to set up WooCommerce shipping methods? This guide has your back with the most up-to-date information.
Here, I’ll walk you through the following:
- What are WooCommerce shipping methods?
- How WooCommerce shipping methods work.
- A rundown of the built-in shipping methods in WooCommerce: flat rate, free shipping, and local pickup.
- How to create shipping methods in WooCommerce.
- Best practices for setting up each shipping method in WooCommerce.

Plugins mentioned in this guide:
- Flat Rate Shipping Plugin for WooCommerce: Add advanced shipping costs based on the cart subtotal, product quantity, product weight, shipping class, product categories, user roles, delivery destination (country, state, ZIP), etc., and other conditions.
- Hide Shipping Method for WooCommerce: Simplify the shipping options shown to customers during the checkout flow by hiding specific shipping methods based on the cart subtotal, shipping zone, shipping class, product categories, applied coupons, user roles, and other parameters.
- Advanced USPS Shipping Plugin: Sync your store with USPS and pull real-time rates directly from USPS to ensure your customers always see accurate rates based on their delivery destination, package weight, dimensions, shipping class, etc.
- WooCommerce Multi-Vendor Shipping Addon: Enable vendors to configure their own shipping methods, rates, and rules — essential for when vendors ship from different locations or use different carriers.
First things first, let’s discuss what WooCommerce shipping methods are and how they work.
What are shipping methods in WooCommerce?
In WooCommerce, shipping methods are the actual options you present to your customers during checkout for how their products will be delivered. They define how much a customer pays and how shipping is calculated based on their shipping zone, cart contents, or other conditions.
How do WooCommerce shipping methods work?
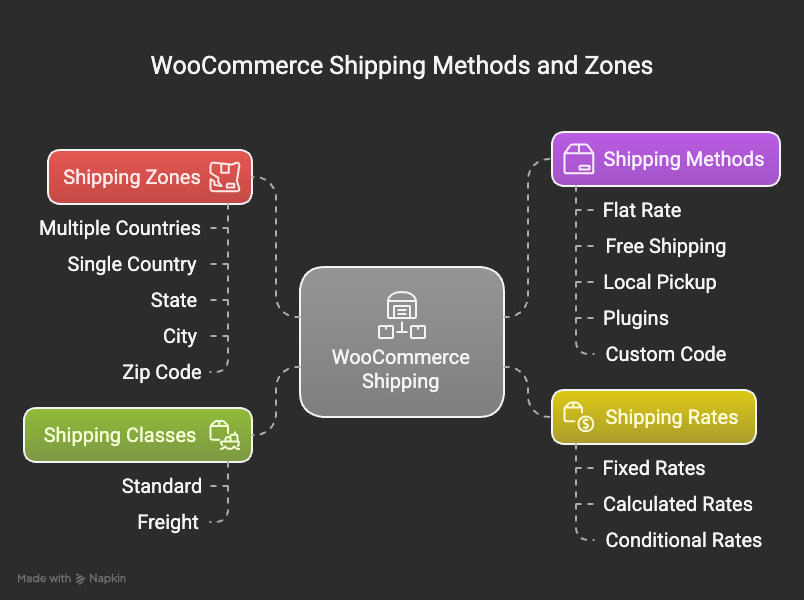
In WooCommerce, shipping is managed through a combination of shipping zones, methods, rates, and classes. To fully understand shipping methods, you need to understand the basics of each setting.
Here’s a brief rundown of how WooCommerce shipping works:
- Shipping zones: Shipping zones are geographic regions your store delivers to. A shipping zone can consist of multiple countries (like the United States and Canada), an entire country (the United States), a state (like California), a single city like (Encino), or even just a zip code. Each zone can have one or more shipping methods attached to it. For example, you might create a zone for California and another for the rest of the U.S., each with different shipping rates.
- Shipping methods: WooCommerce shipping methods live inside shipping zones. Within each zone, you can select from three inbuilt shipping methods: flat rate, free shipping, and local pickup, and add as many shipping methods as necessary. You can also use plugins or custom code snippets to extend the available shipping methods — for example, real-time shipping rates, advanced conditional shipping rules, and more.
- Shipping rates: When customers enter their delivery address during checkout, WooCommerce looks up the matching zone and surfaces available shipping methods and costs for each method (fixed, calculated, or conditional). Customers can choose their preferred method from the available options. If no methods are available for the customer’s location, they won’t be able to complete their purchase.
- Shipping classes: Shipping classes group products and apply specific costs. For instance, a furniture retailer selling lightweight and heavy furniture can create two shipping classes — “Standard” with $5 shipping and “Freight” with $50 shipping — and set different flat rates for each.
An overview of the inbuilt WooCommerce shipping methods
Out of the box, WooCommerce provides 3 core shipping methods: flat rate, free shipping, and local pickup. Here’s an in-depth look at each.
Flat rate shipping
Probably the most commonly used shipping method in WooCommerce, flat rate shipping lets you set a fixed cost per order, item, or shipping class.
Flat rate shipping is set at the shipping zone level. Once added, the flat rate method lets you define a shipping cost using static values or simple formulas. The cost is calculated based on the customer’s cart and shipping address.
WooCommerce gives you basic control over how to configure flat rates to charge shipping fees. You’re not limited to a single flat fee; you can apply costs using basic placeholders depending on what’s in the cart. For instance, you can charge:
- A fixed cost per order no matter what’s in the cart e.g. (10 = $10 total).
- A per-item rate by the number of items in the cart e.g. ([qty] * 5 = $5 per item).
- Based on shipping class e.g. (Shipping Class A = $5, Shipping Class B = $10).
Flat rate shipping works best for stores that:
- Ship similar-sized products with largely predictable costs.
- Want to keep the checkout flow as simple as possible.
- Are facing high cart abandonment rates as a result of unclear or delayed information about shipping charges.
Limitations of the inbuilt flat rate shipping method
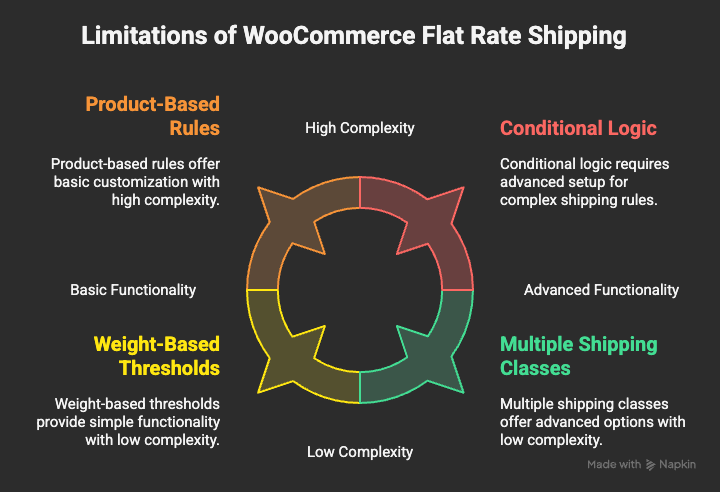
Flat rate shipping is ideal for stores with straightforward pricing — think: fixed costs by region or simple per-item fees. However, it is limited in other situations. Here’s what I mean:
- Limited flexibility for product-based rules. It isn’t possible to create detailed rules based on product attributes like weight, category, or dimensions. If you sell a mix of small and oversized items, applying a single flat rate across all orders can either eat into your margins or overcharge customers (unless you set up shipping classes, which can be complicated for non-WooCommerce experts).
- No weight- or quantity-based thresholds. While you can use basic shortcodes like [qty] or [cost] in the flat rate calculation, there’s no way to apply thresholds that control how they are applied. For example, to charge $10 for orders under 5kg, and $20 for orders above or apply a different flat rate to shopping carts that contain more than 3 items.
- No conditional logic. Customers are shown all available flat rate shipping methods based on their shipping zone. There’s no way to show or hide rates based on additional conditional parameters like user role, product type, shipping class, etc.
- Limited control across multiple shipping classes. You can assign different costs for different shipping classes, however, the way WooCommerce handles multiple classes in one cart is basic. You can only choose between costs per class which adds the cost for each class or per order which applies only the highest class cost. This doesn’t work well for mixed-product orders with nuanced handling fees.
Free shipping
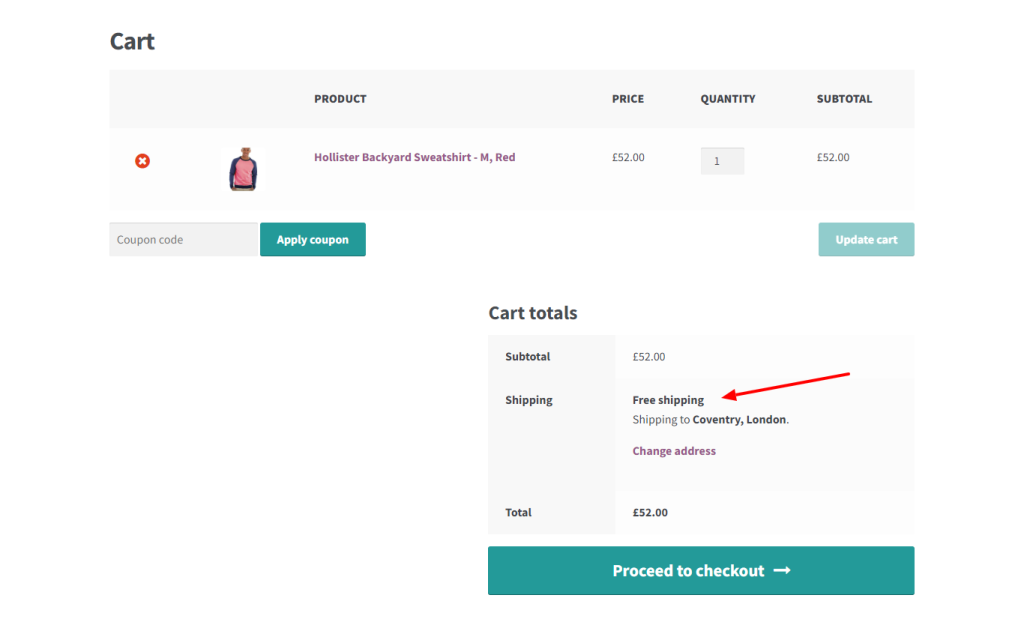
As the name implies, the free shipping method lets you offer delivery at no cost to your customers when certain conditions — such as minimum spend, coupon usage, etc. — are met. Because zero-cost delivery is tied to specific criteria, it can boost conversion rates and average order value when used strategically.
Unlike flat rate shipping, free shipping must be triggered by one or more rules you define at the shipping zone level. WooCommerce doesn’t apply it by default — you must set the conditions clearly.
A quick note: Free shipping works well with coupons in WooCommerce. You can create a coupon code, check the “Allow free shipping” box, and tie it to your free shipping method. Only when that coupon is applied will the free shipping option appear. This gives you tons of flexibility for email promotions, flash sales, loyalty programs, etc.
Limitations of free shipping
- Limited conditions. There are 5 basic built-in conditions for free shipping: a valid coupon, a minimum order amount, a minimum amount OR a coupon, a minimum amount AND a coupon, and no requirement. You can’t natively configure free shipping based on weight, shipping class, product category, user role, and other parameters.
- Not flexible for product-level rules. There’s no inbuilt way to offer free shipping only on certain products without using workarounds like creating super specific zones or using product shipping classes in a limited way.
- No tiered thresholds. There’s only one threshold per method. You can’t create tiered incentives like: standard free shipping over $50 and expedited free shipping over $100.
- No control over combined shipping methods. WooCommerce still shows other available methods like flat rate or local pickup for shopping carts that qualify for free shipping. This can confuse customers and lead to more abandoned carts.
Local pickup
Purpose-built for WooCommerce businesses with retail stores, warehouses, fulfillment centers, local delivery hubs, etc., that allow customers to collect their orders in person, local pickup saves both time and shipping costs and can improve the post-purchase experience.
It is free by default, but you can charge a fee if needed. Some stores charge a nominal handling fee for pickup to offset packaging costs or staff time spent packing orders for in-store handoff.
Like other WooCommerce shipping methods, you can enable local pickup per shipping zone, meaning that you control exactly where and when it’s available.
Note: By default, WooCommerce treats the local pickup shipping method as if the customer is receiving the order at your store’s base location, not at their shipping address. This adjusts the tax base which impacts how taxes are calculated. For example, let’s say your store is headquartered in New York. If a customer based in New Jersey selects local pickup, WooCommerce will apply New York tax rates, not New Jersey’s. You’ll need to manually change this setting in WooCommerce → Settings → Tax, if needed.
Limitations of local pickup
- No support for multiple pickup locations. Out of the box, WooCommerce doesn’t support more than one local pickup location. If you have two stores — or a warehouse and a retail outlet — there’s no way for the customer to choose where they want to pick up the order.
- Limited customization of pickup details. The field to add local pickup details is quite limited. It can be challenging to add pickup instructions, hours, or address details during checkout. You’ll need to manually add this information in other places, such as the order confirmation email, thank-you page, or a dedicated section on your site.
- You can’t restrict pickup by product type. If you sell a mix of physical goods and digital products or ship some items but not others, there’s no way to prevent customers from selecting local pickup when their cart only contains items that should be shipped.
- No conditional availability. You can’t show or hide local pickup based on specific conditions like customer role, coupon usage, cart total, etc.
How to set up the default shipping methods in WooCommerce
In this section, I’ll show you step-by-step how to configure flat rates, free shipping, and local pickup in WooCommerce with the default settings.
How to set up flat rate shipping in WooCommerce
- In your site’s dashboard, navigate to WooCommerce → Settings → Shipping → Shipping zones.
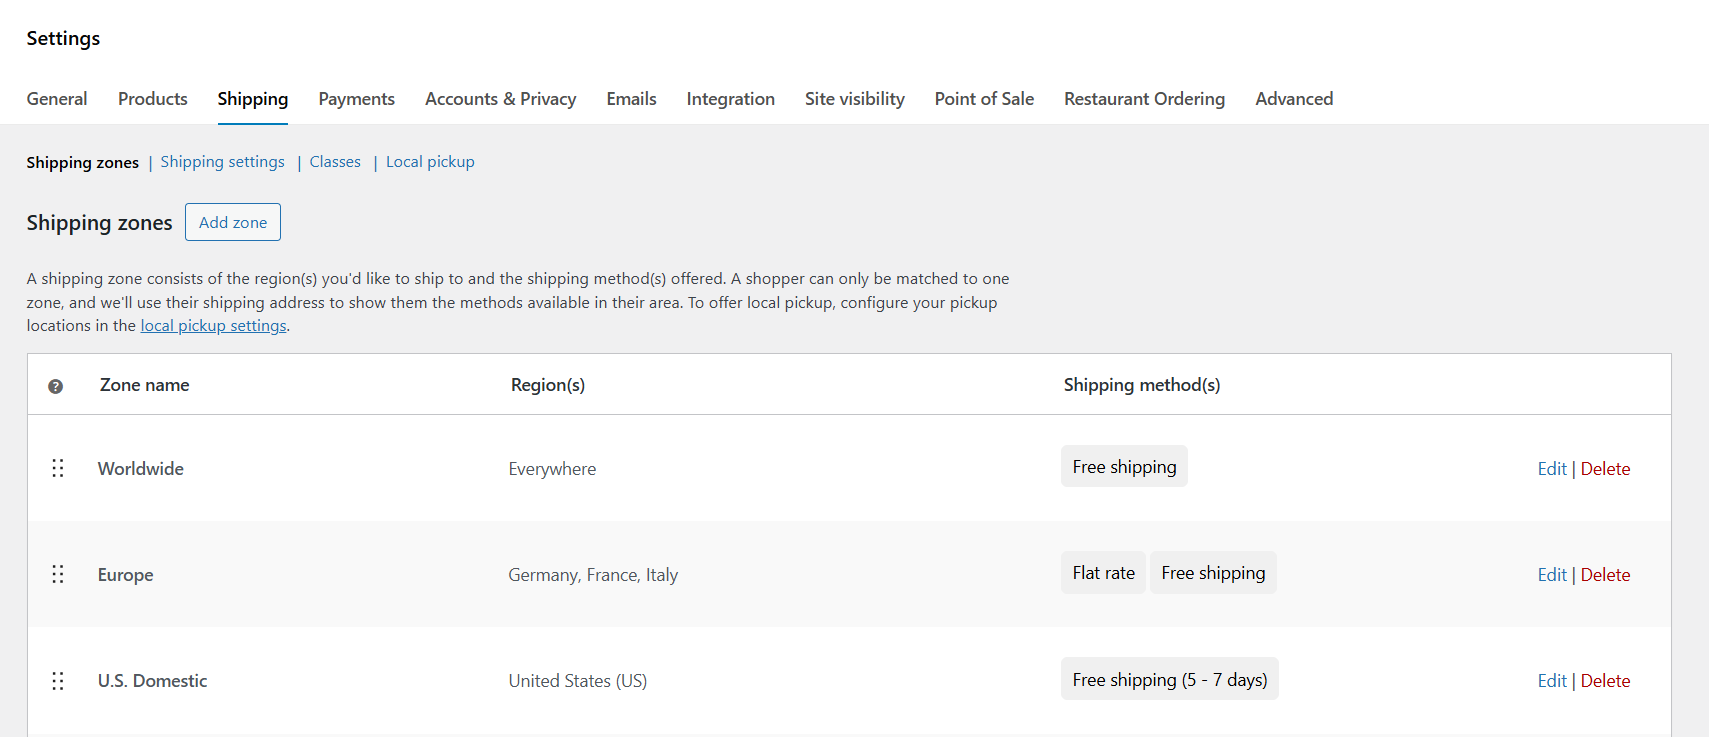
- Press “Add zone” and add the relevant details. For this tutorial, we’ll create a zone for the United States that consists of the 48 contiguous states.
- Name the zone something that makes it easier for admins to identify “US Domestic”, “Standard Shipping”, etc.
- Under “Zone regions,” type “United States” then select relevant states to be included in this zone.
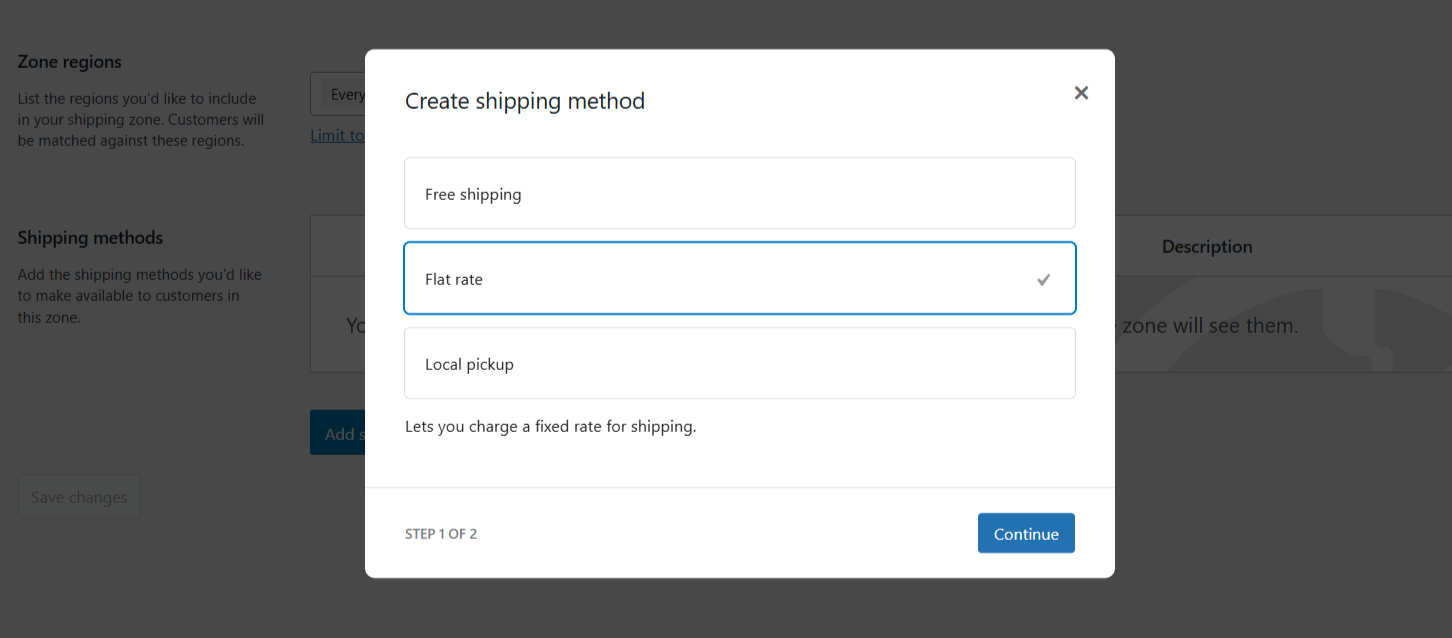
- Press “Add shipping method” then pick “flat rate” from the pop-up modal and press “Continue”.
- Update the details on the next screen:
- Name: Enter the label for this WooCommerce shipping methods which will be shown to customers on the front end. This is set to “flat rate” by default but you can rename it if needed.
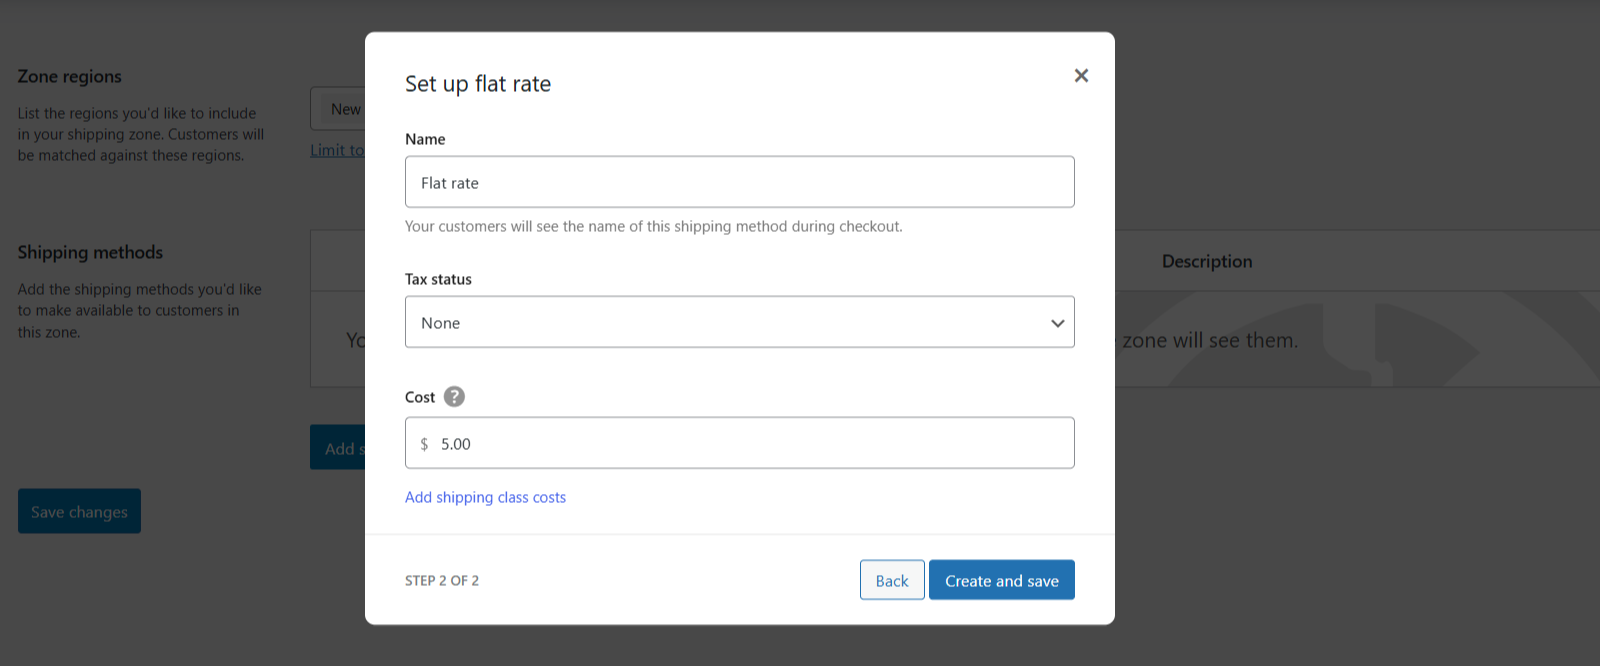
- Tax status: Decide whether or not this method is taxable. Note: set this to “Taxable” if shipping costs are subject to sales tax.
- Cost: Enter the flat rate per item fee or a price formula shortcode that calculates the shipping fee e.g. [qty] = number of items in cart, [cost] = cart subtotal (before shipping and tax), etc. Here are some examples to guide you to set this:
- Fixed fee per order: Enter 5 → This charges $5 for every order.
- Per item fee: Use [qty] * 3 → This charges $3 per item in the cart.
- Percentage of cart total: Enter [cost] * 0.05 → This charges 5% of the cart total
- Base fee + per item: 4 + (2 * [qty]) → $4 base + $2 per item.
- Shipping class costs: Optionally, enter the shipping class cost and choose how the flat rate fee should be applied — per class or per order.
- Name: Enter the label for this WooCommerce shipping methods which will be shown to customers on the front end. This is set to “flat rate” by default but you can rename it if needed.
- Press “Create and save”.
That’s it. If you want to set up more than one flat rate in the same shipping zone, press “Add shipping method” again and choose Flat Rate then configure each method differently. Customers will see multiple options and can select their preferred method during the checkout flow.

How to set up free shipping in WooCommerce
- In your site’s dashboard, navigate to WooCommerce → Settings → Shipping → Shipping zones.
- Press “Add zone” and add the relevant details. For this tutorial, we’ll create a zone for the United States that consists of the 48 contiguous states.

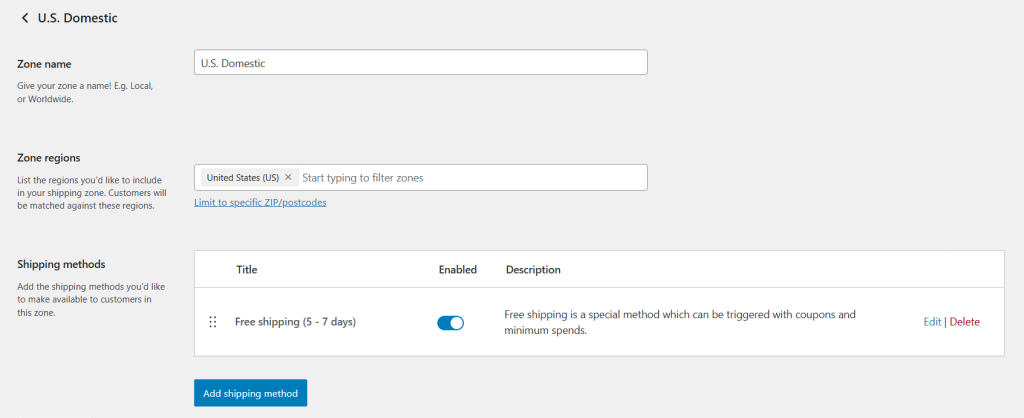
- Name the zone something like “US Domestic”.
- Under “Zone regions,” type “United States” then select relevant states to be included in this zone.
- Press “Add shipping method” then pick “Free shipping” from the pop-up modal and press “Continue”.
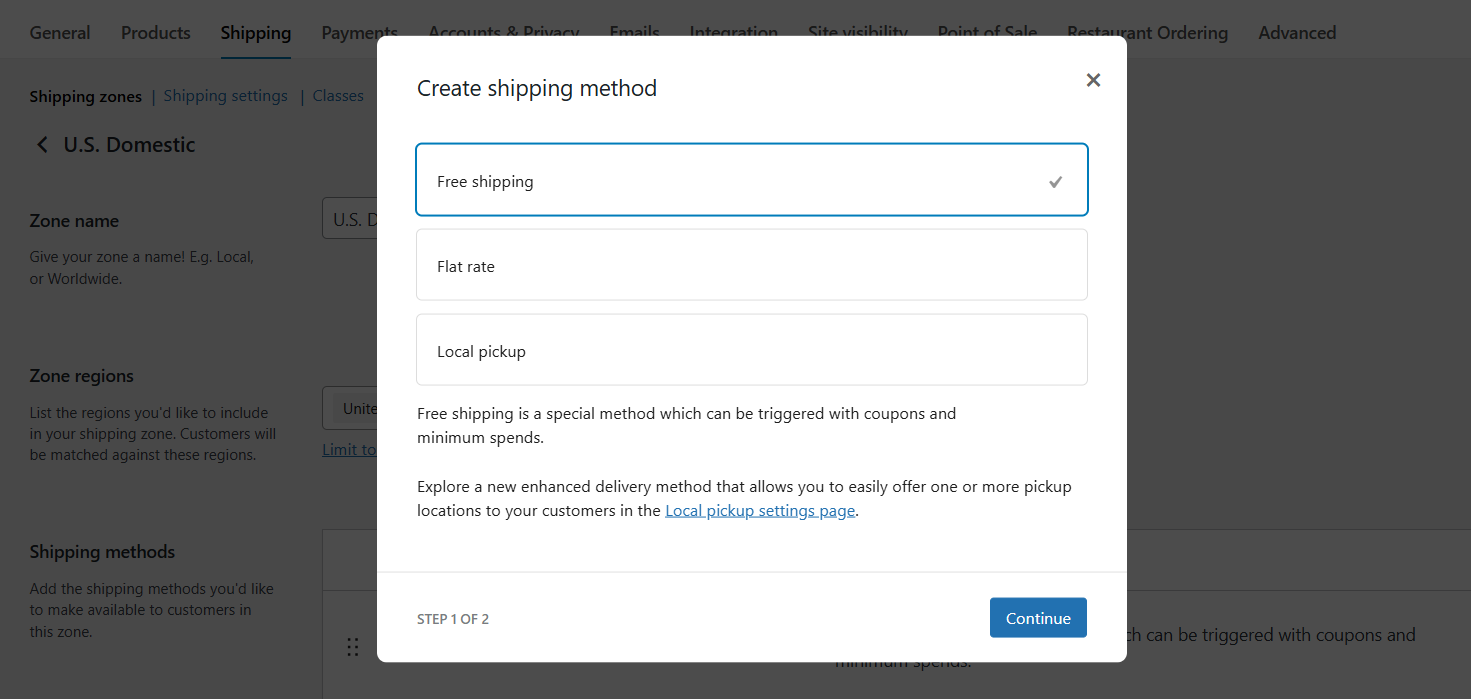
- Update the details on the next screen:
- Name: Enter the label for this shipping method which will be shown to customers on the front end. This is set to “Free shipping” by default but you can rename it if needed.

- Free Shipping Requires: Specify the condition customers must fulfill to qualify for free shipping:
- No requirement
- A valid free shipping coupon
- A minimum order amount
- A minimum order amount OR a coupon
- A minimum order amount AND a coupon
- Name: Enter the label for this shipping method which will be shown to customers on the front end. This is set to “Free shipping” by default but you can rename it if needed.
Note: If you want to offer free shipping in situations where customers use a specific promo code, you must create the coupon via Marketing → Coupons.
How to set up local pickup in WooCommerce
- In your site’s dashboard, navigate to WooCommerce → Settings → Shipping → Local pickup.
- Tick the “Enable local pickup” checkbox.
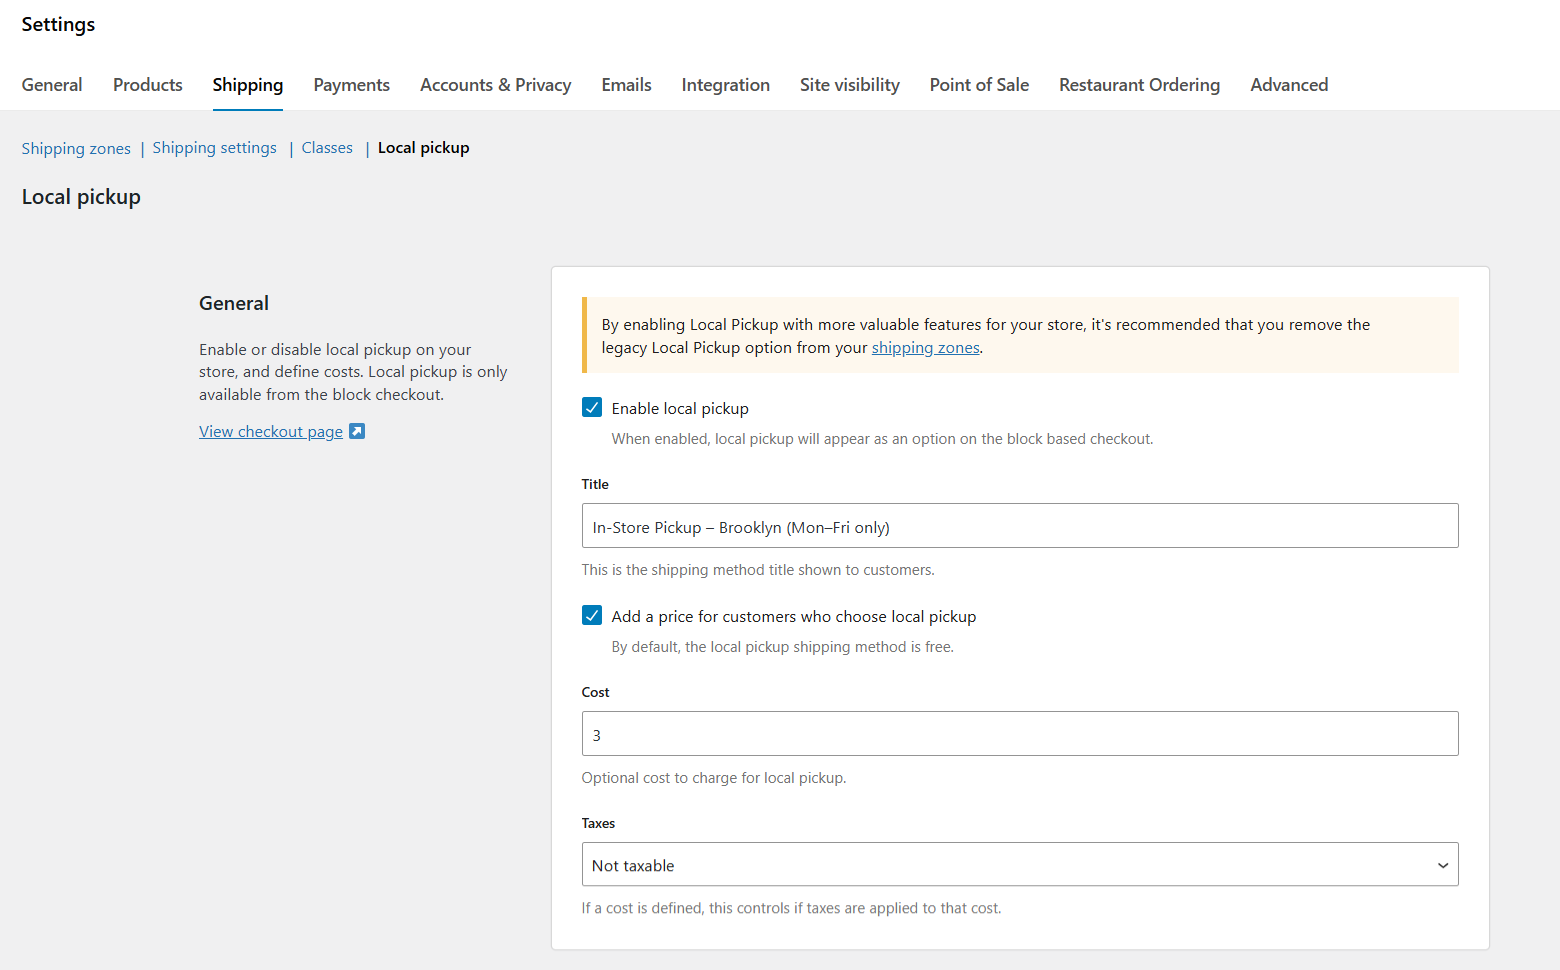
- Title: Enter the label for this shipping method which will be shown to customers on the front end. This is set to “Pickup” by default but you can rename it for clarity.
- If you want to charge a handling or pickup fee, tick the “Add a price for customers who choose local pickup” checkbox.
- Enter the shipping fee in the “cost” field and specify whether or not it is taxable.
- Scroll down to the “Pickup location” section and press “Add pickup location”.
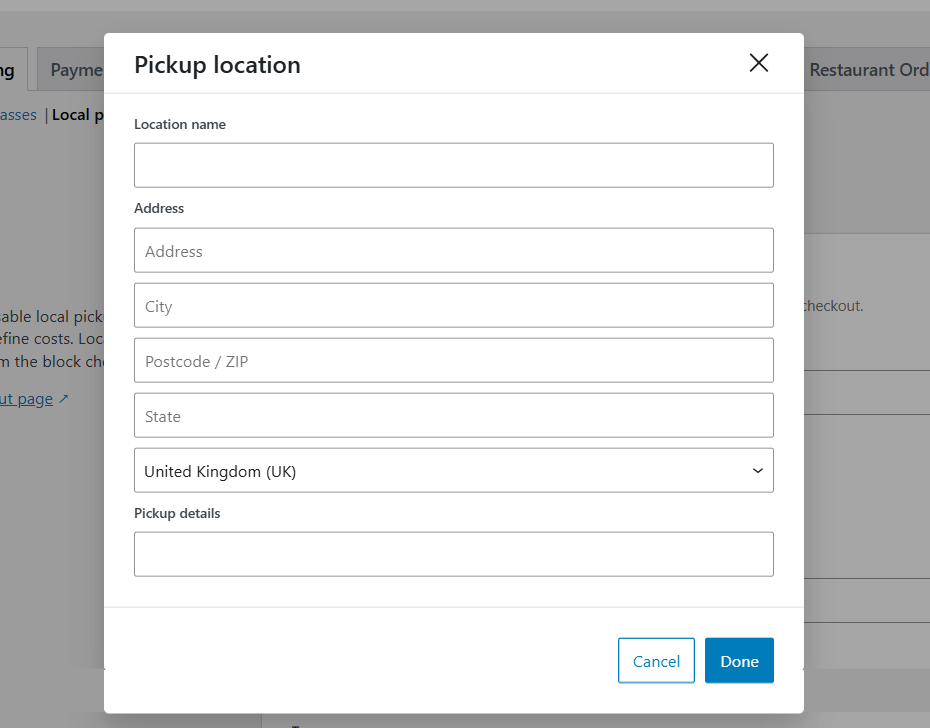
- Update the name and address of the pickup location along with additional details as needed and press “Done”.
- Finally, press “Save changes” to apply the updates.
- Navigate to WooCommerce → Settings → Shipping → Shipping zones.
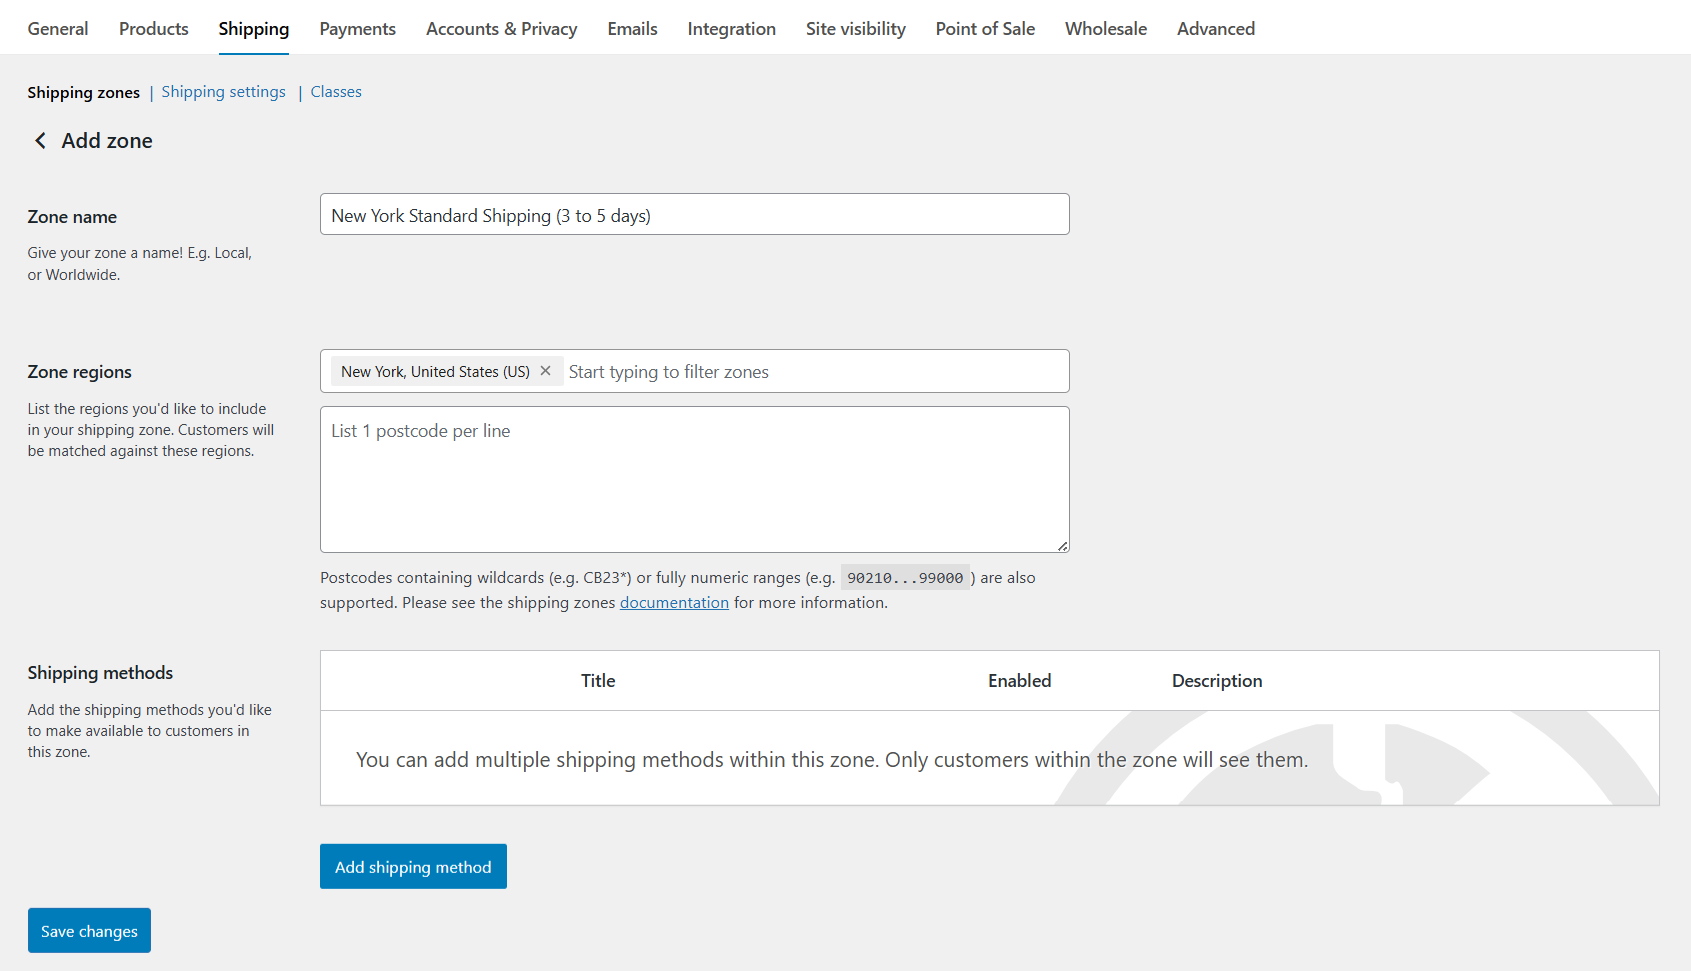
- Press “Add zone” and add the relevant details. For this tutorial, we’ll create a zone for the New York.
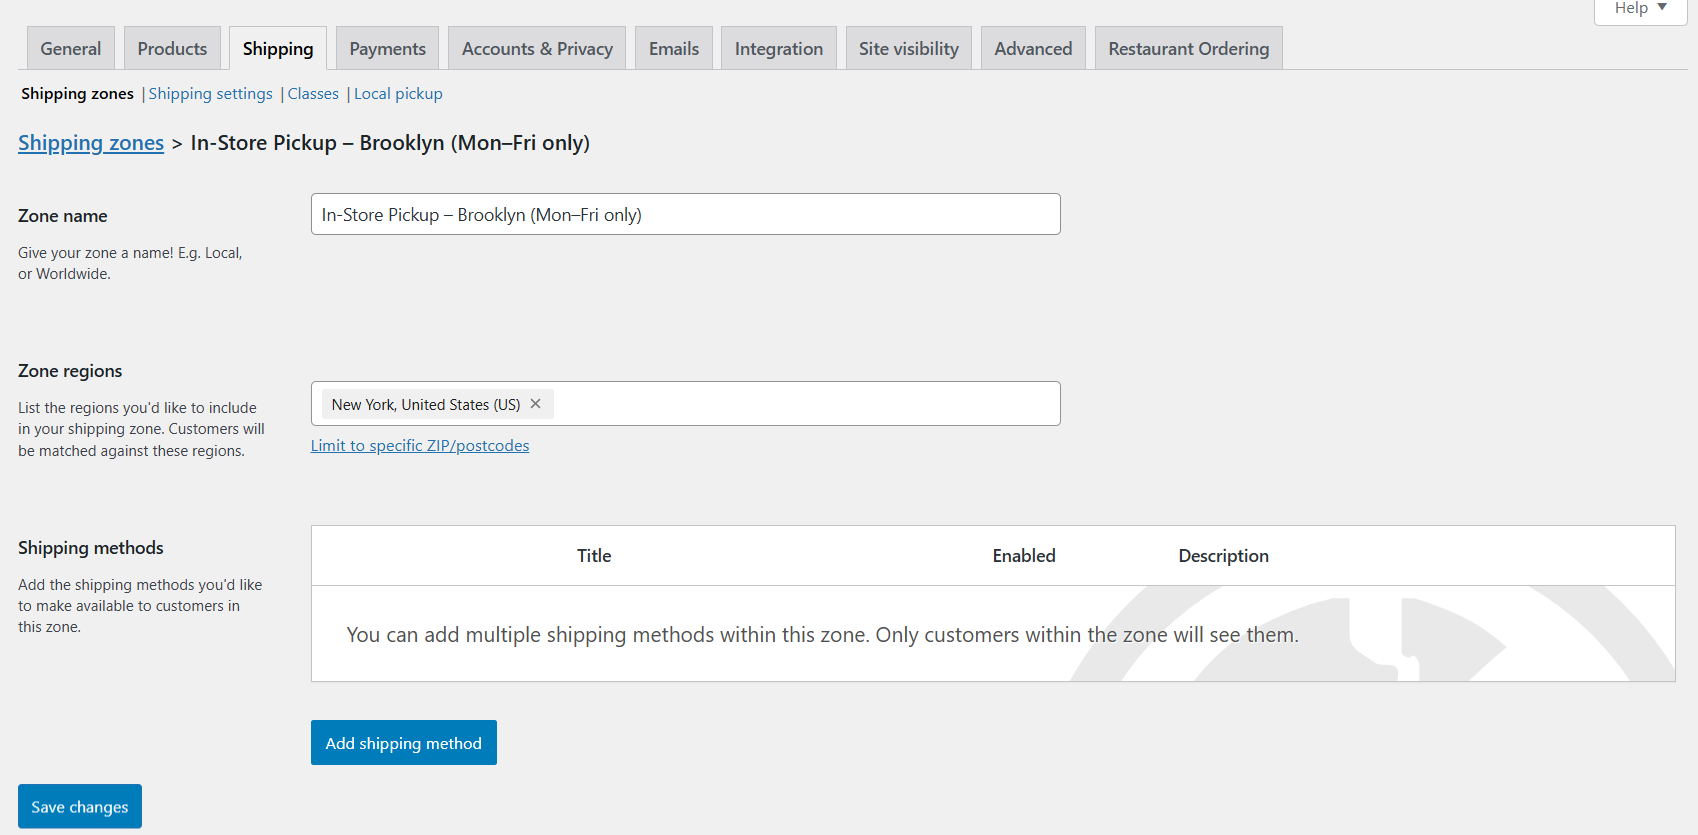
- Name the zone something like “New York”.
- Under “Zone regions,” type and select “New York”.
The best plugins to set up advanced WooCommerce shipping methods
These are the best free and premium plugins to get rid of the limitations of the inbuilt WooCommerce shipping methods and upgrade your store’s shipping options.
Flat Rate Shipping Plugin for WooCommerce
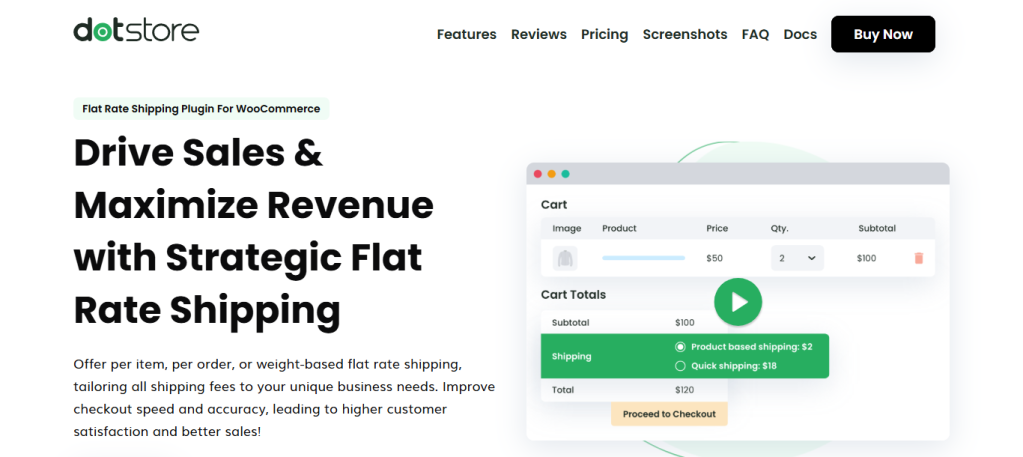
Flat Rate Shipping Plugin for WooCommerce lets you set advanced shipping costs based on a wide range of conditions like the cart subtotal, product quantity, product weight, shipping class, product categories, user roles, delivery destination (country, state, ZIP), etc.
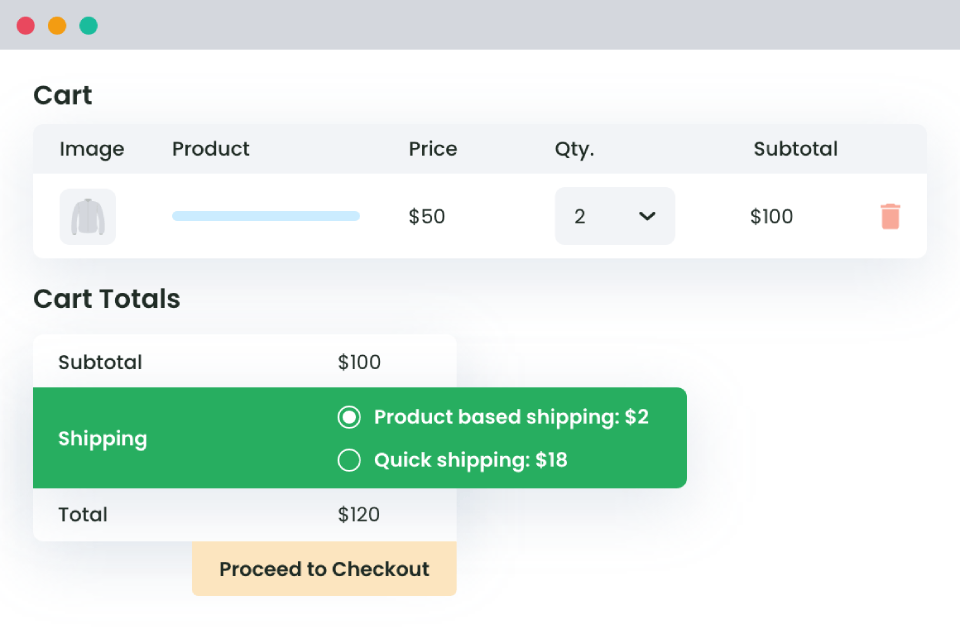
Unlike the standard WooCommerce setup which allows just one flat rate per zone, this plugin lets you create multiple custom flat rate methods for the same shipping zone with each shown conditionally based on the items in a customer’s shopping cart. For example, you can charge $10 shipping for orders under $50 but offer $5 shipping for orders above $50. Or, add a $20 fee to shopping carts that contain any item from the “Furniture” category.

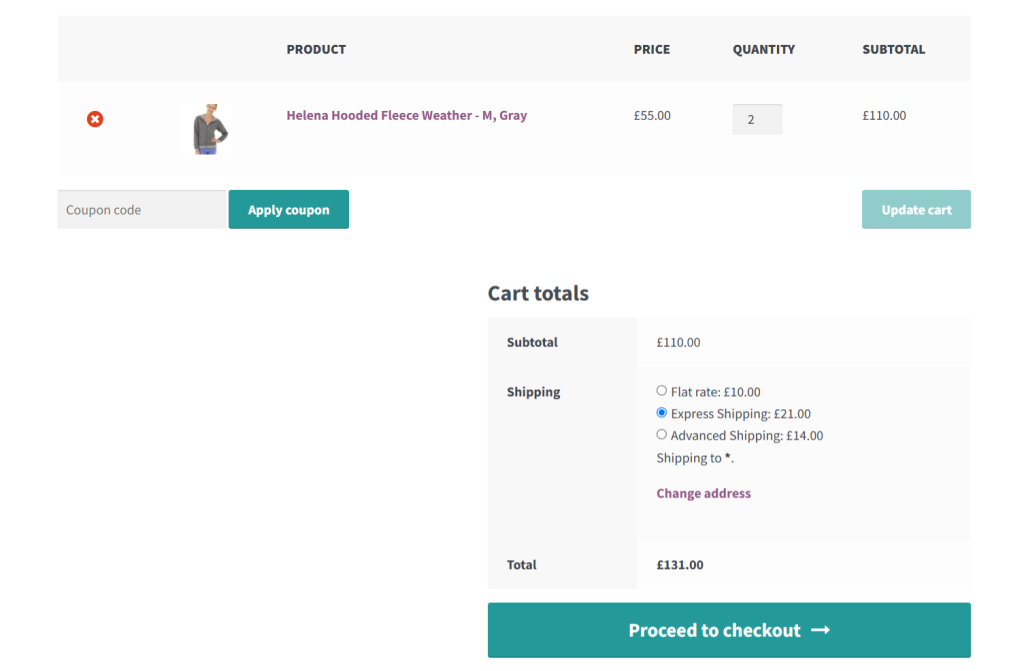
Plus, it supports conditional logic using AND/OR combinations, so you can fine-tune exactly when a method is shown. For example, you can choose to only show the “Express Shipping” flat rate method for shopping cart subtotals over $100 and shipping weight of under 5kg.
As a bonus, you can set it up to hide paid shipping methods in WooCommerce when free shipping is available. This avoids cluttering the checkout page and confusing customers which can result in a higher number of abandoned carts.
Best of all, the plugin is simple to set up and use, even if you’re not tech-savvy. Check out its free or pro version today.
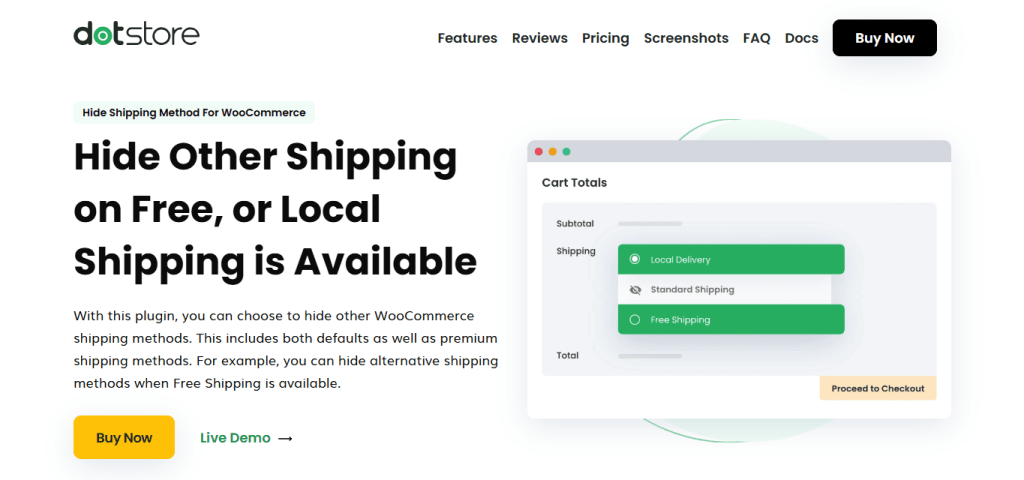
Hide Shipping Method For WooCommerce
If you have a large product catalog, ship to customers located in several destinations, or both, you’ll likely need to set up several shipping zones and methods. The downside of this? WooCommerce doesn’t offer much control over when and how shipping methods appear, which can create friction — especially when multiple methods are shown for the same order.
As the name implies, Hide Shipping Method for WooCommerce allows you to simplify the shipping options shown to customers during the checkout flow. It lets you hide specific shipping methods based on the cart subtotal, shipping zone, shipping class, product categories, applied coupons, user roles, and other parameters.
It works with any WooCommerce shipping method, including those set up with inbuilt settings, third-party extensions, custom logic, and shipping carrier plugins like USPS, FedEx, and UPS.
Check out Hide Shipping Method for WooCommerce’s free or pro version today.
Advanced USPS Shipping Plugin
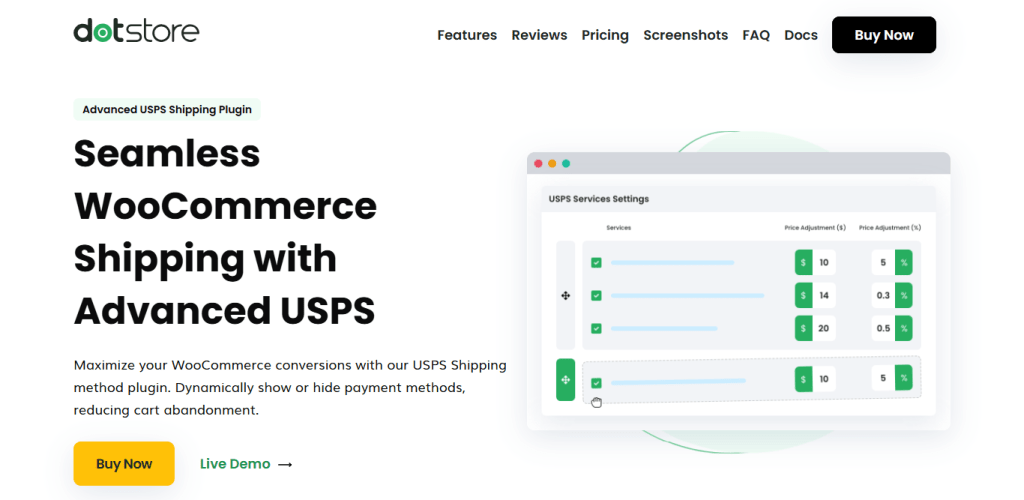
Stores that ship products within the U.S. and globally and rely on USPS as their primary carrier need to use the Advanced USPS Shipping Plugin.
Particularly useful for stores that ship a wide range of package sizes, weights, and destinations, this plugin enables you to pull real-time USPS rates, automate label generation, and offer more accurate, reliable shipping options to your customers — without overcharging or underestimating costs.
Advanced USPS Shipping Plugin pulls real-time rates directly from USPS to ensure your customers always see accurate rates based on their delivery destination, package weight, dimensions, shipping class, etc.
Check out Advanced USPS Shipping Plugin’s free or pro version today.
WooCommerce Multi-Vendor Shipping Addon
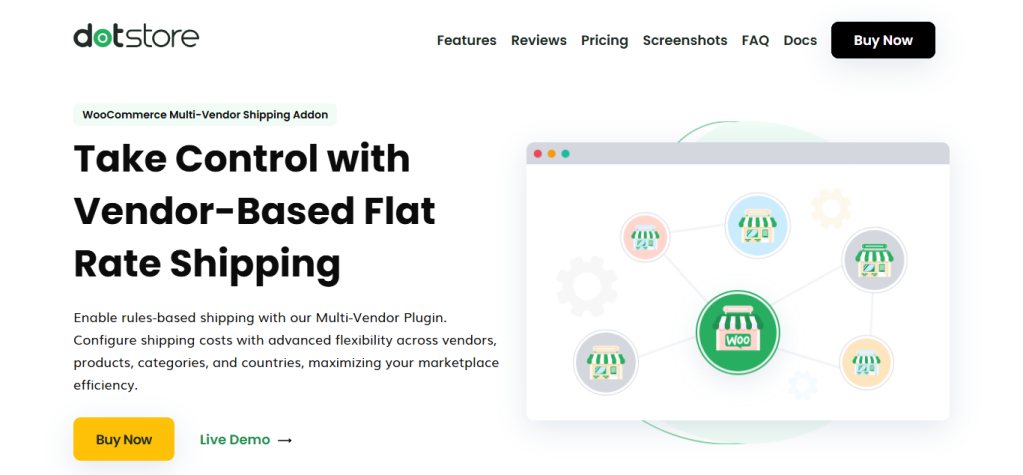
Managing shipping in multi-vendor marketplaces isn’t so straightforward. For instance, each vendor may have different shipping origins, methods, and costs.
WooCommerce Multi-Vendor Shipping Addon pairs well with the Flat Rate Shipping Plugin for WooCommerce to help admins run multi-vendor marketplaces better.
This add-on supports WooCommerce shipping zones, so vendors can define their own zones and methods just like the main store admin. You can enable each vendor to configure their own shipping methods, rates, and rules — essential for when vendors ship from different locations or use different carriers.
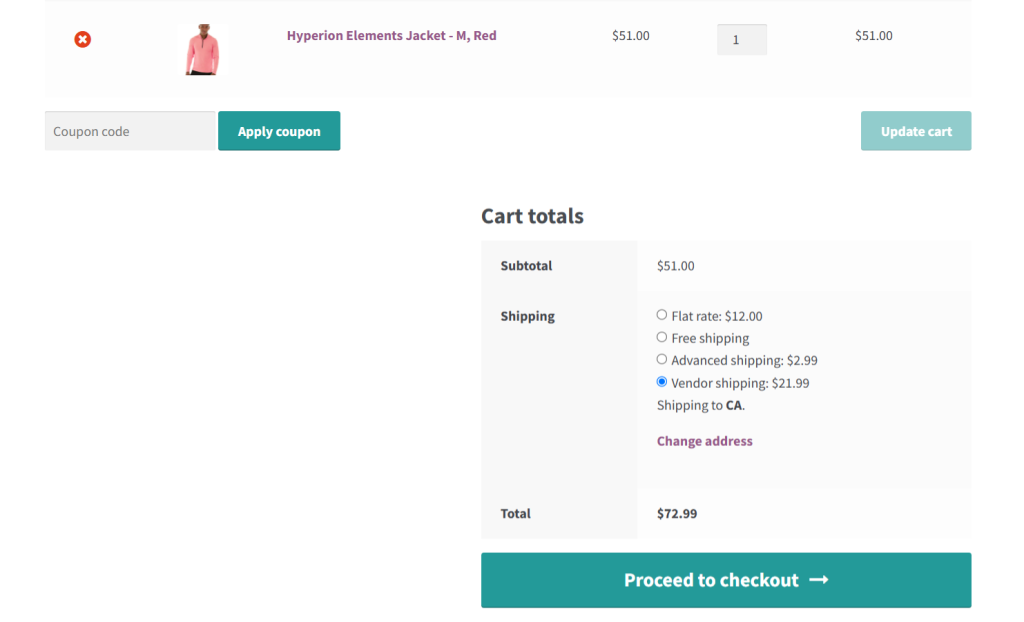
Shipping is calculated per vendor based on their own rules. When a customer adds products from multiple vendors to their cart, the plugin splits the shipping calculations accordingly, and the total is added to the order.
On the front end, customers are shown a clear breakdown of shipping costs by vendor, rather than one generic shipping fee so they know exactly what they’re paying for.
Check out WooCommerce Multi-Vendor Shipping Addon’s today.
How to set up advanced flat rate shipping in WooCommerce
The in-built method for setting up flat rate shipping in WooCommerce is pretty limited. Follow these steps if you want to add advanced flat rate shipping rules such as user roles, product variation, shipping location, etc.
Step 1: Add the advanced flat rate shipping method in WooCommerce
- Add the free or pro version of Flat Rate Shipping Plugin For WooCommerce to your ecommerce site.
- Navigate to Flat Rate Shipping → Manage Rules within your site’s admin panel, and press “Add New”.
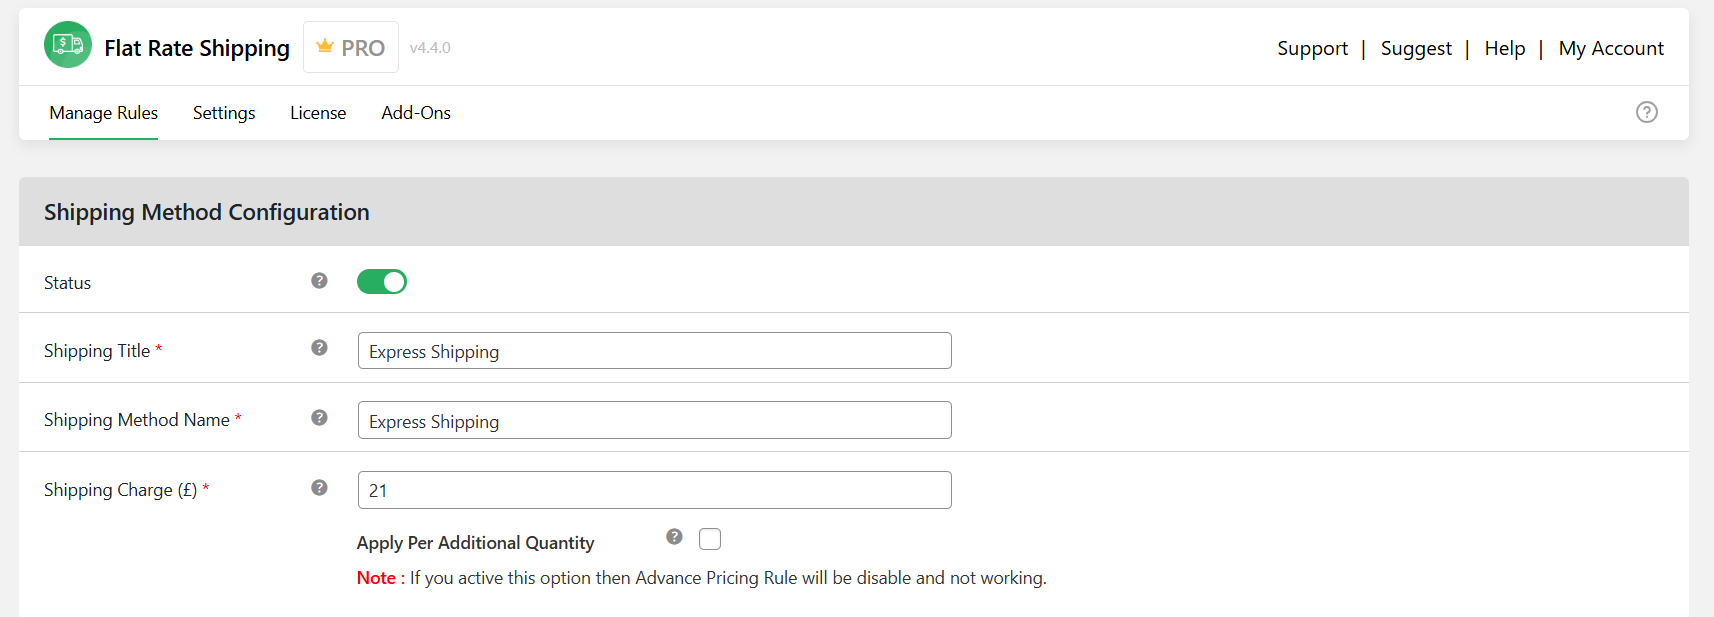
- Enable the “Status” option to activate the rule.
- Shipping Title: Add a name for this WooCommerce shipping method that will be visible to site admins only.
- Shipping Method Name: Add a name for this shipping method that will be visible on your site’s front end. Note: Keep it simple and descriptive e.g., Standard Shipping – US.
- Pick the appropriate primary parameters from the below set of options for this flat rate shipping rule:
- Shipping Charge: Add the fixed fee (e.g., $10). If you’d like to apply the flat rate shipping fee per item, tick the “Apply Per Additional Quantity” checkbox.
- Allow Free Shipping: This will set the shipping fee to zero.
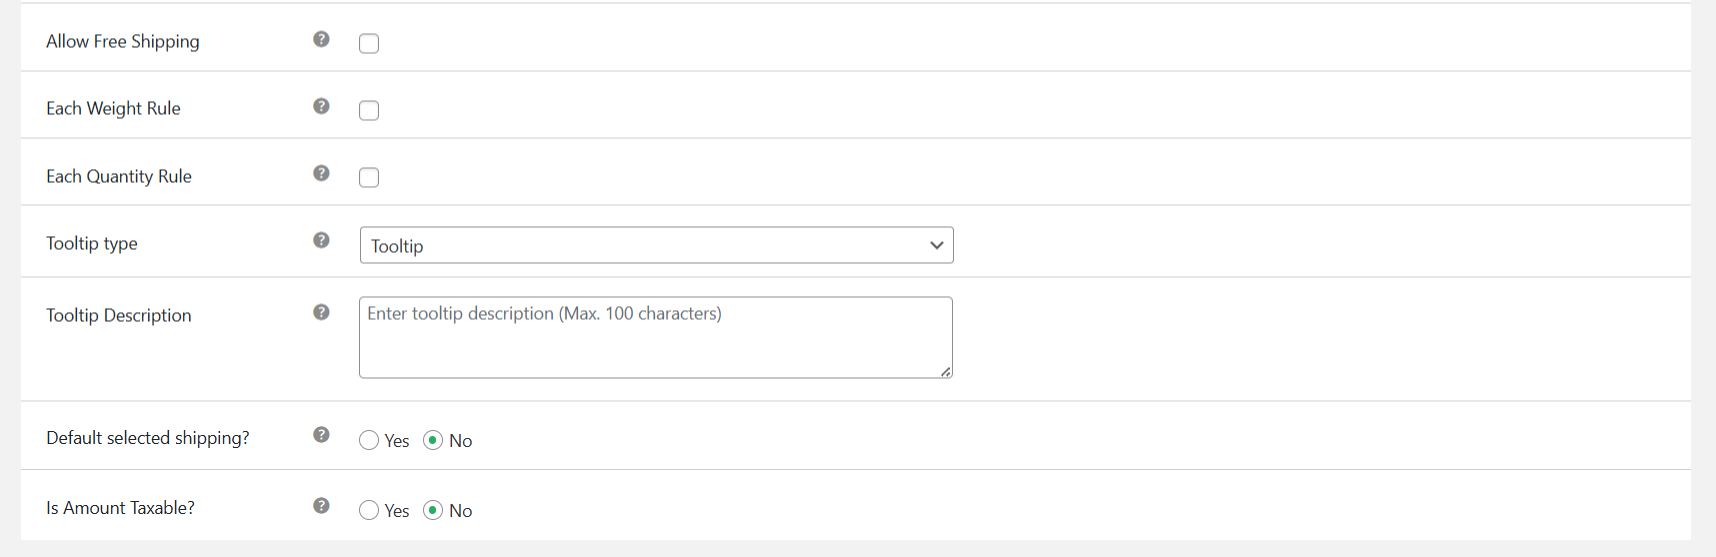
- Each Weight Rule: This will activate weight-based shipping.
- Each Quantity Rule: This will activate quantity-based shipping.
- Choose the desired style for the tooltip: tooltip or subtitle, and add a brief description for the tooltip.
- Make this WooCommerce shipping method the default, if appropriate.
- Define whether this shipping rate is taxable or not.
Step 2: Assign shipping classes and conditions to this advanced flat rate shipping method
- If appropriate, update the shipping rates according to the shipping class in the “Additional Shipping Charges Based on Shipping Class” section. Note that you can define this for bulky, discounted, lightweight, or poster pack products, and specify how they are enforced.
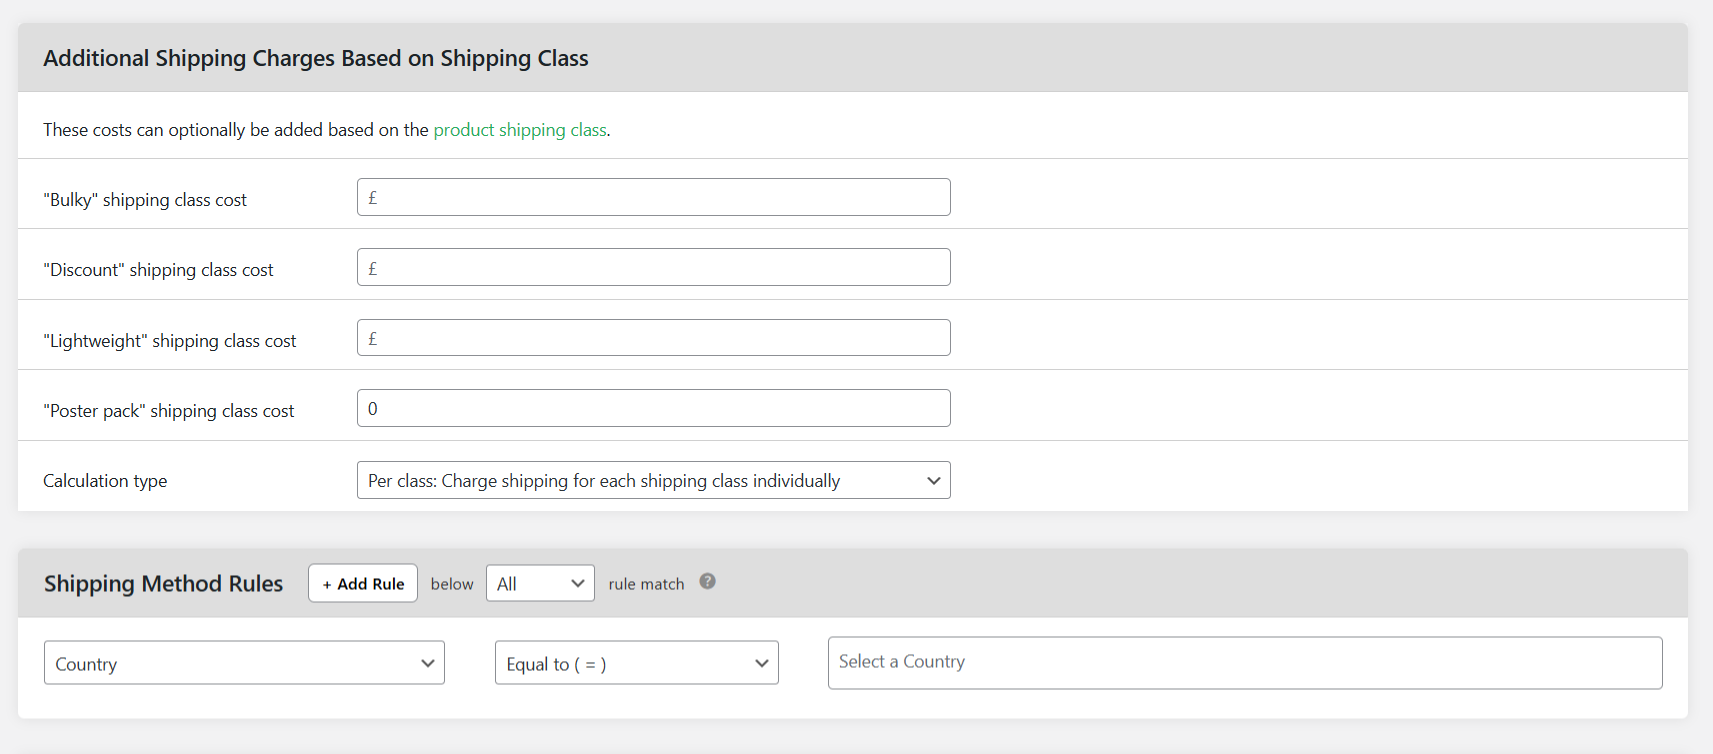
- If needed, scroll down till you locate the “Shipping Method Rules” area and press “Add Rule”.
- Pick your preferred condition type, operator, and value, and add as many rules per flat rate shipping option as needed.
- If needed, scroll down till you locate the “Advanced Shipping Price Rules” area and enable it. From this section, you can add more rules to dynamically calculate the shipping cost for this flat rate shipping method based on various parameters. For example, you can set a $3 baseline rate + $0.50 per item or a $7 baseline rate + $1.5 per kg rate.
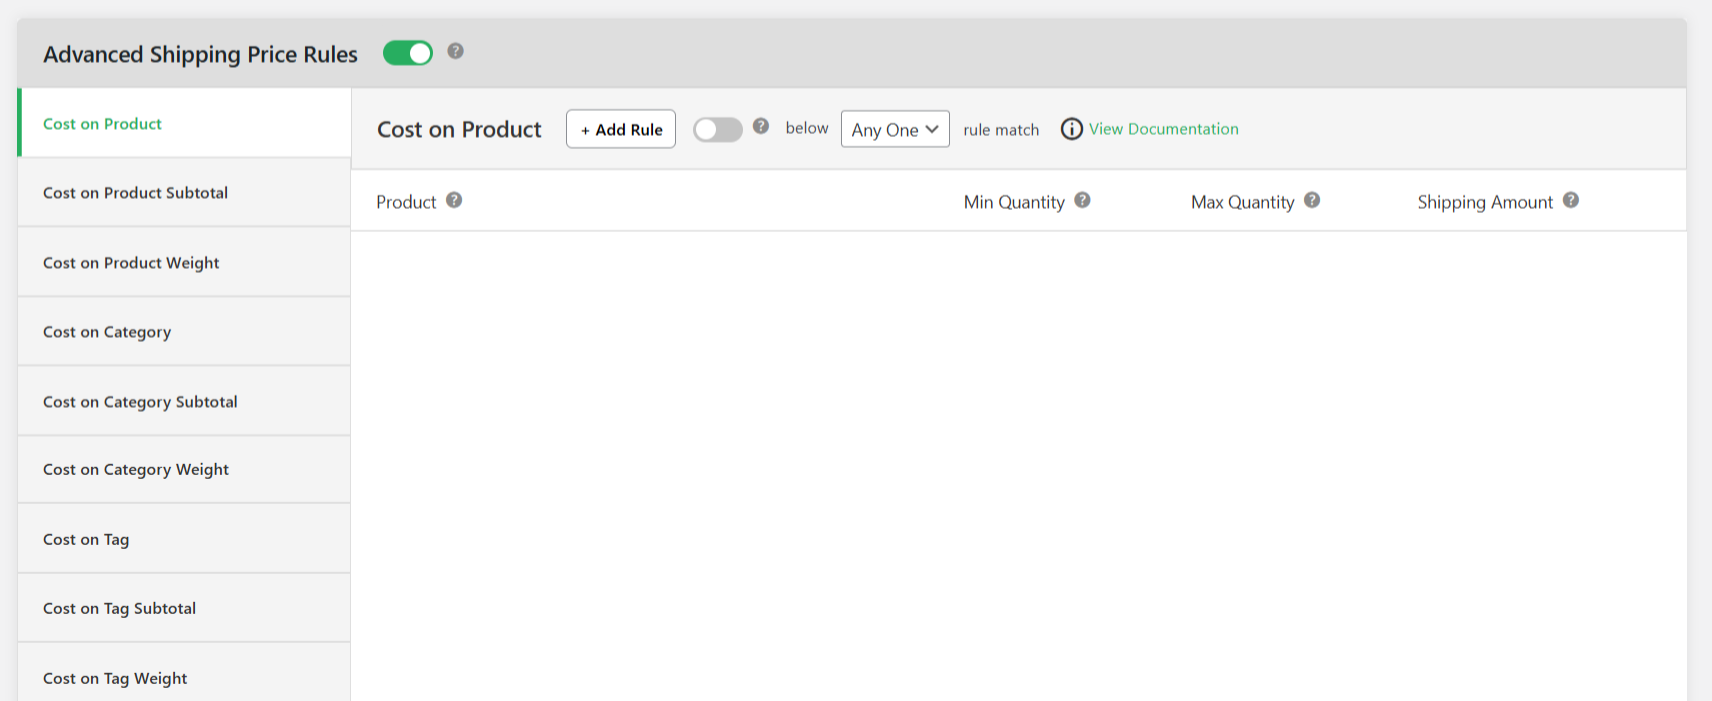
- Save your changes once done.
Step 3: Set up additional settings (optional)
- Prioritize shipping options: If you added multiple flat rate shipping rules, you can define the priority that they are presented on the front end of your website. To do so, navigate to Flat Rate Shipping → Manage Rules and rearrange them as desired. Rules higher up the list have higher priority.
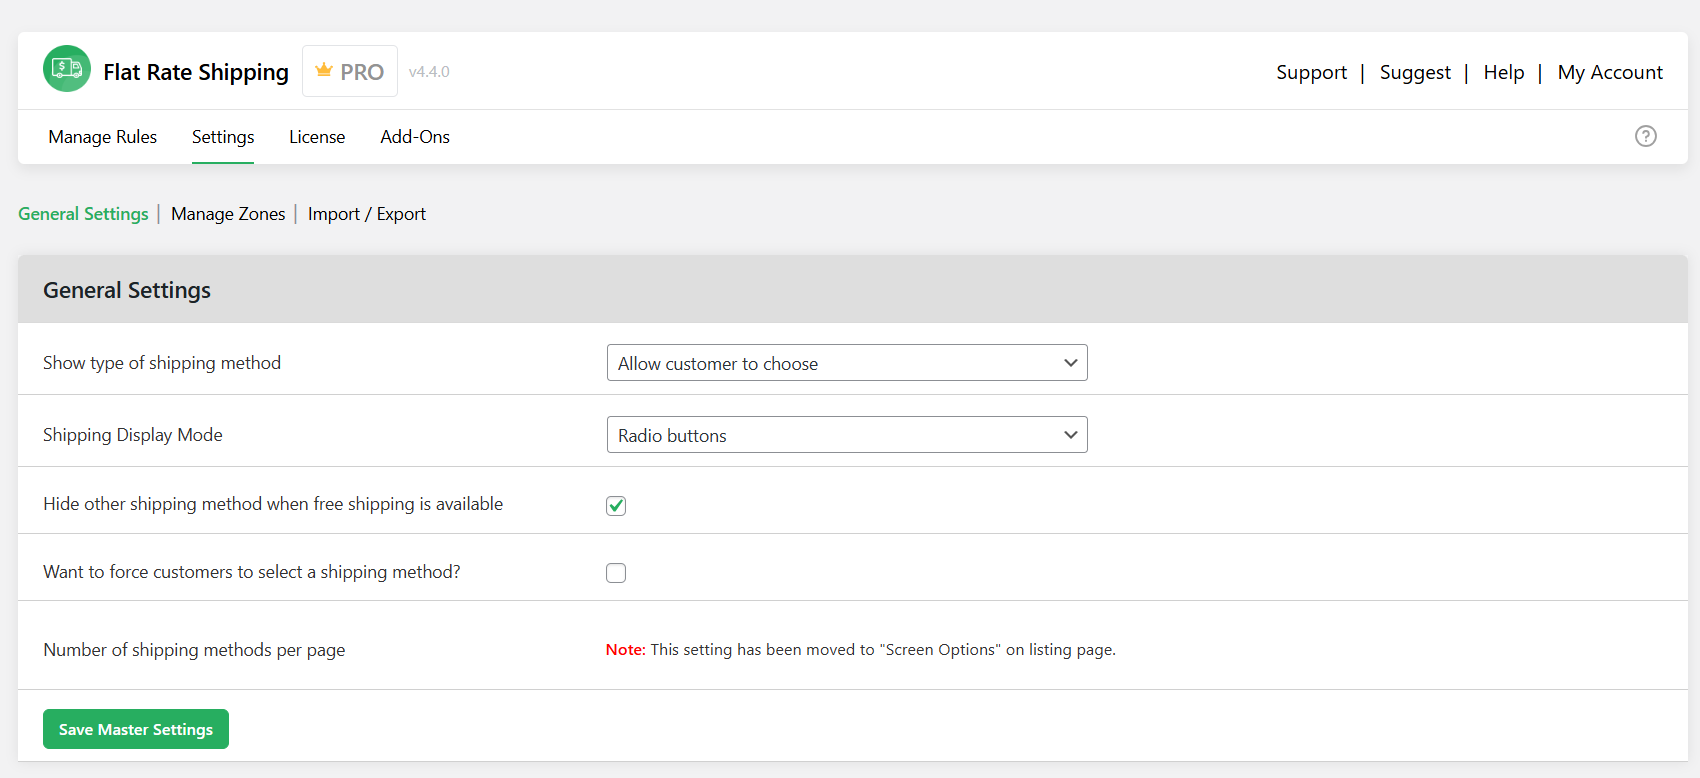
- Hide other shipping methods: If you’d only like to show free shipping if applicable, go to Flat Rate Shipping → Settings → General Settings in your site’s admin. Then activate the “Hide other shipping method when free shipping is available” setting.
That’s it. Feel free to go to the front-end view of your website and add a few products to your shopping cart. Go through the steps in the checkout flow to confirm that it accurately calculates the shipping rate taking the rules and conditions into account.
Best practices for configuring WooCommerce shipping methods
Flat rate shipping
- If you offer multiple flat rates per zone, label them clearly so customers can pick their preferred option based on speed and budget. For example, “Standard (3–5 days) – $7” and “Express (1–2 days) – $15”
- Make use of cost shortcodes like [qty] and [fee] to dynamically calculate shipping costs. For example, 10 + ( 2 * [qty] ) = $10 base + $2 per item.
- Create and assign shipping classes to pair products with similar handling or delivery costs (e.g., “Bulky Items,” “Lightweight,” “Fragile”).
Free shipping
- Offer free shipping on orders over a certain subtotal, i.e. minimum threshold, to boost your average order value and prevent shipping costs from eating into your profit margins.
- Pair free shipping with coupons for limited-time campaigns or special event promotions.
- Spotlight the free shipping perk across your store: homepage banners, cart page messages, and product detail pages.
- If you offer free shipping at a similar speed alongside other methods, hide other methods to avoid confusing customers.
Local pickup
- Use clear, descriptive labels to name this shipping method. This reduces confusion and helps build trust. For instance, “Pickup from Downtown Store”, “Collect from Warehouse (Mon–Fri only)” or “In-Store Pickup – Brooklyn”.
- Send detailed instructions including pickup address, hours, and contact details in the order confirmation emails.
- Use specific postal codes in your shipping zones to restrict pickup to customers in nearby zip codes.
FAQs about WooCommerce shipping methods
What is role based shipping payment methods for WooCommerce?
The Dotstore’s Flat Rate Shipping Plugin for WooCommerce enables you to define different shipping options, rules, and costs for different customers based on their user role (like Customer, Wholesale Buyer, Subscriber, Retailer, etc). And you can combine role-based conditions with other advanced rules, like shipping zones, product categories, cart subtotal, quantity, weight, etc.
Rather than applying shipping and payment methods globally to every customer, Flat Rate Shipping Plugin for WooCommerce enables you to add complex conditions that personalize customers’ checkout experiences to make sure that the right people see the right shipping methods (and prices). For example, your wholesale customers might get discounted or free shipping, while retail customers pay standard rates.
What is the USPS shipping method for WooCommerce?
By default, WooCommerce doesn’t provide a native USPS integration. The Dotstore’s Advanced USPS Shipping Plugin for WooCommerce connects your store directly to USPS’s live API and automatically fetches and displays real-time shipping rates directly from USPS’s website.
This integration enables you to offer multiple USPS shipping services, like Priority Mail, First-Class, Express Mail, and Parcel Select, with ease. Plus, you can define fallback rates in case USPS is temporarily unavailable and set custom handling fees or discounts based on your store to fine-tune final shipping costs in line with your store’s strategy.
Purpose-built for WooCommerce store admins who ship within or from the U.S, Advanced USPS Shipping Plugin for WooCommerce shows customers accurate, up-to-date carrier-calculated shipping costs based on their addresses, cart weight, and package size during the checkout flow.
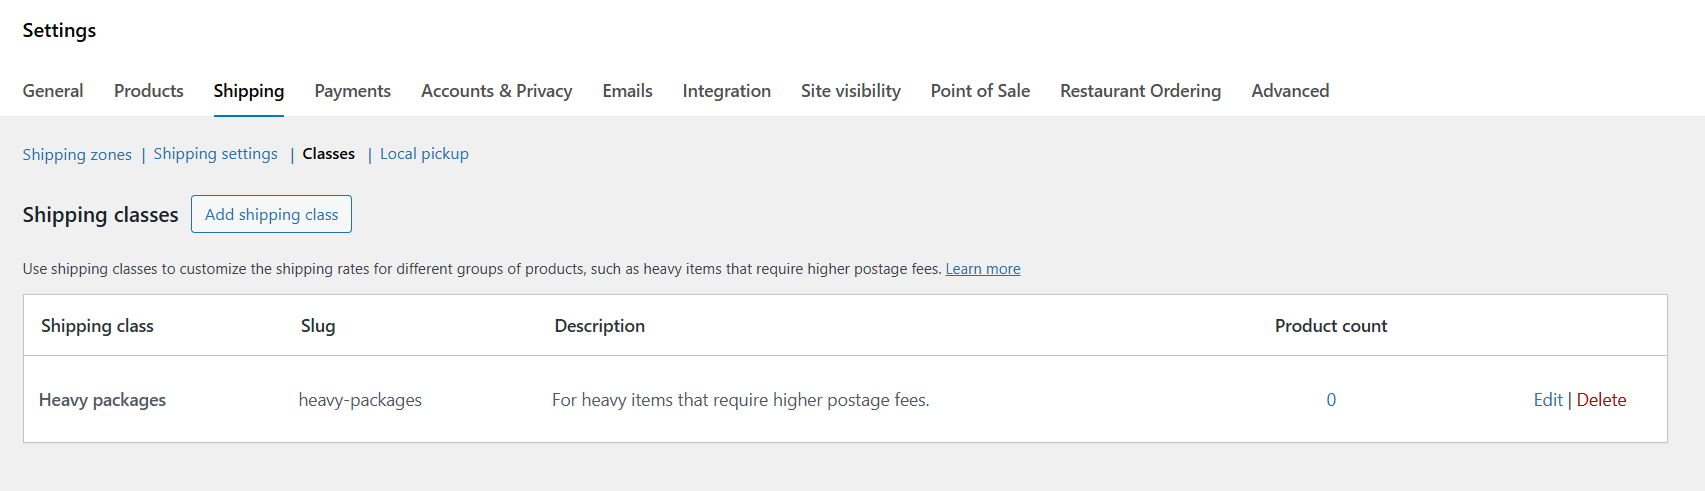
What are shipping classes in WooCommerce?
Shipping classes in WooCommerce are a way to group similar products together so you can apply different shipping rates based on product type, size, or weight.
Shipping classes are particularly helpful for stores that sell different kinds of items whose shipping costs tend to vary a lot, such as fragile versus bulky products. Once you define shipping classes, you can assign them to each product, and WooCommerce uses those classes when calculating shipping fees for an order.
In theory, WooCommerce’s idea of shipping classes is straightforward. However, setting them up and maintaining them can quickly become complex and restrictive as your product catalog and shipping options grow.
The Dotstore’s Advanced USPS Shipping Plugin for WooCommerce’s free version lets you set advanced shipping rules with custom conditions. With it, you can set different flat rates by product, category, weight, quantity, subtotal, or shipping zone, combine conditions, offer free shipping for order totals that exceed certain thresholds, restrict or show shipping options based on customers’ user roles in your store (like wholesale vs. retail), and much more.
Set up WooCommerce shipping methods today!
Configuring WooCommerce shipping methods properly means that you can offer your customers tailored delivery options and improve their shopping experience while meeting your business objectives.
WooCommerce, by default, offers 3 basic inbuilt shipping methods: flat rate, free shipping, and local pickup.
Check out these top-tier plugins if you’d like to bypass the limitations of the default shipping methods and configure advanced rules.
- Flat Rate Shipping Plugin for WooCommerce: Set advanced shipping costs based on the cart subtotal, product quantity, product weight, shipping class, product categories, user roles, delivery destination (country, state, ZIP), etc., and other conditions.
- Hide Shipping Method for WooCommerce: Simplify the shipping options shown to customers during the checkout flow by hiding specific shipping methods based on the cart subtotal, shipping zone, shipping class, product categories, applied coupons, user roles, and other parameters.
- Advanced USPS Shipping Plugin: Connect your store with USPS and pull real-time rates directly from USPS to ensure your customers always see accurate rates based on their delivery destination, package weight, dimensions, shipping class, etc.
- WooCommerce Multi-Vendor Shipping Addon: Empower vendors to configure their own shipping methods, rates, and rules — essential for when vendors ship from different locations or use different carriers.