Table of Contents
When planning to start your online venture, WooCommerce stands out as one of the best e-commerce platforms available on the web. The fact is, it is backed by the WordPress community, so entrepreneurs find it ideal to kick start their online business.
Another reason why WooCommerce is the best channel for an e-commerce business is the loads of features and functionalities it has. Thousands of themes and a bundle of plugins, WooCommerce offer maximum customization giving you the ease to design your store the way you find it best.
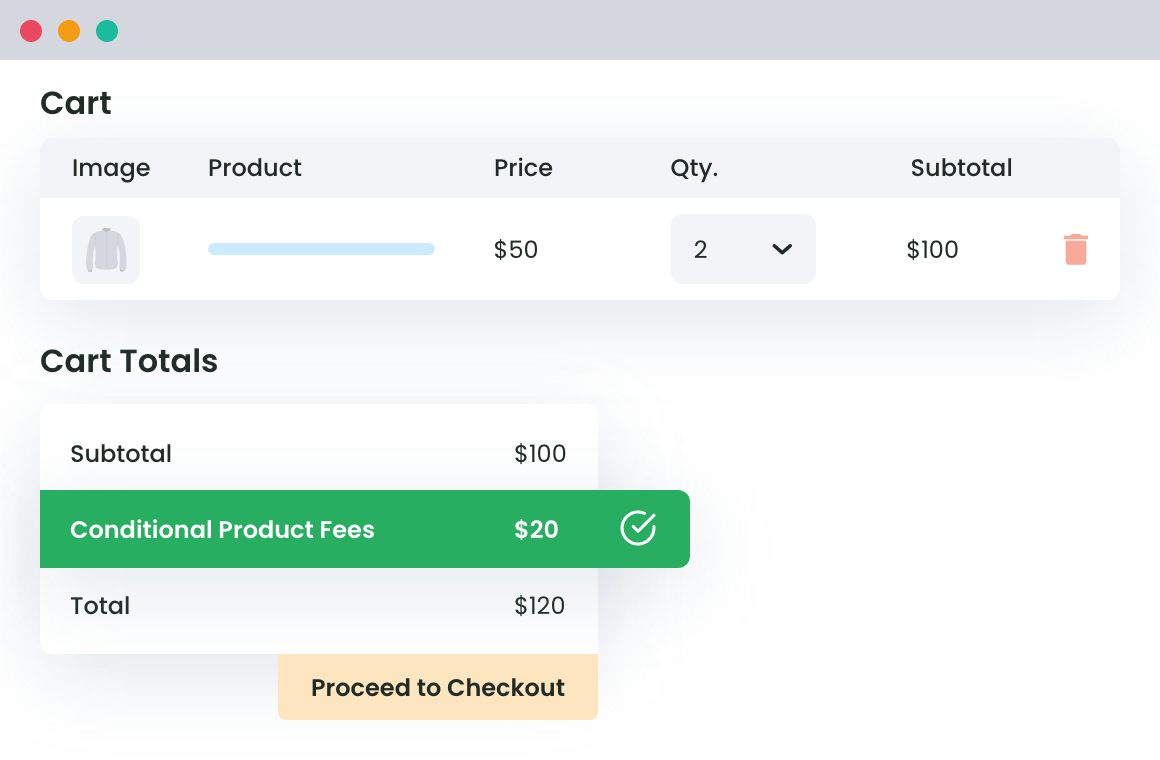
One of these is the ability to add WooCommerce extra fees on Checkout. Yes, you heard that. You no longer need to ply with the standard fee option provided by the WooCommerce store.
But do you actually need to add extra fees during the checkout? Why cannot you keep rates fixed, like you have the product fee, a flat shipping rate, and done?
Is it not what every store does?
Apparently not, but you should. So, in this article, we will take you about:
- Why Do You Need To Add Extra Fees In Your WooCommerce Store?
- How to Add Additional Fees during the Checkout Process
- The plugin to use for this purpose, and how to configure it.
- Examples for how to add WooCommerce Checkout Extra Fees
Let’s begin.
Why Do You Need To Add Extra Fees In Your WooCommerce Store?
While there are multiple reasons why a WooCommerce store would need extra fees during the checkout, here are a few common ones.
Handling charges
Online selling is not just about clothes or footwear. Instead, it can be anything from a sensitive glass item too expensive jewelry, furniture, or a TV. Shipment and courier of all these products require extensive care. They to be dispatched separately taking into consideration the possibility of damage or breaks.
Suppose that a customer places an order for an oven. The fact that the item is not just expensive but also sensitive, you would need to pay extra charges for the handle with care. Of course, you would not want to pay it from your pocket and hence, WooCommerce additional fees on the checkout.
Shipping to different regions
Online stores have a global reach. Irrespective of where you operate from, you need to deliver products all across the city and maybe to different regions as well. Now, the shipping cost incurred in dispatching products varies from place to place. Imagine two customers place a product at the same time.
One is from Middle East Europe whereas the other one is from India. Now the shipping costs for delivering it to the first one are $30 whereas the charges incurred in dispatching it to India are $52. Keeping a standard rate here would either mean overcharging your customers or paying from your pockets. It is important to have flexibility within the way your store operates and once again, you would need to have additional fees at the checkout.
A limited number of items
Imagine a customer placing an order for a product worth rupees $59. Of course, you cannot deny someone placing a single order but don’t you think, dispatching a single item would cost you high?
Retailers often set a bar for minimum value to be eligible for free orders. In case the value is below the said amount, the customer is liable to pay extra charges or to be precise, additional fees during the checkout.
Payment Methods
Often the payment merchants charge you for the payment. While cash on delivery has been the preferred mode of payment for long, customers are quickly moving to online forms of payment. Digital wallets are taking over the traditional payment method. And not all channels initiate payments for free. The majority of the payment gateways levy a certain percentage of the money as their transaction charges. The same needs to be billed against the customer and once again, you need to customize your store for additional fees during checkout.
Quick Delivery
Standard deliveries take 3-4 business working days to be delivered. However, it so happens that buyers are in a hurry to get a product and avail the facility of a quick delivery or one-day delivery. Now when you are speeding up the process and doing all to get the product delivered in less than 24 hours, you are bound to spend extra cost and given the fact that it was the customer who chooses the option in the first place, the amount has to be billed against them.
Hence, you would need to add rule-based fees during the checkout process.
WooCommerce Extra Fees
Make profits from every confirmed sale through smart, conditional fees.
14-day, no-questions-asked money-back guarantee.

How to Add Additional Fees during the Checkout Process
Now that you have a sound idea on why should you add additional fees during the checkout, our next question is how?
While you can always modify the backend to embed the option, WooCommerce is about making things easier and swifter. Hence, we introduce the concept of WooCommerce Extra Fees Plugin. and check video demo

WooCommerce Extra Fees Plugin is an excellent plugin by DotStore. It helps in customization of the checkout page by adding rule-based additional fees. The plugin offers a series of choices and has multiple features, each tailored to simplify the job of creating additional fees.
If you are not sure how to use it, here we have a short guide detailing you on the usage.
Getting Started:
- To begin with, we first need to download the plugin.
- Click-open the WordPress website and enter the login credentials to validate your identity.
- On the dashboard, move down to the plugin and select Add New.
- Now scroll down to the search bar and enter the name of the plugin.
- Click on the search. The page would display the plugins similar to the name. If you do not see the name, you can download the plugin and then, upload it here.
- After you have downloaded the plugin, click on install and activate to get started with the plugin.
Configuring the Plugin
Once you have installed the plugin, we now move ahead to configure the same and add rules.
- Log in to the dashboard of the website and then click on plugins.
- Select the WooCommerce Additional Fees Plugin.
- The plugin page opens up with multiple tabs to set and configure.
- You can create a new fee or edit the existing one. Also, you can keep track of the data.
- In order to create the first product fee, move to the section that says Add New Fees.

- The page would have multiple fields and tabs to be filled.
- To configure the plugin, follow the details given below:
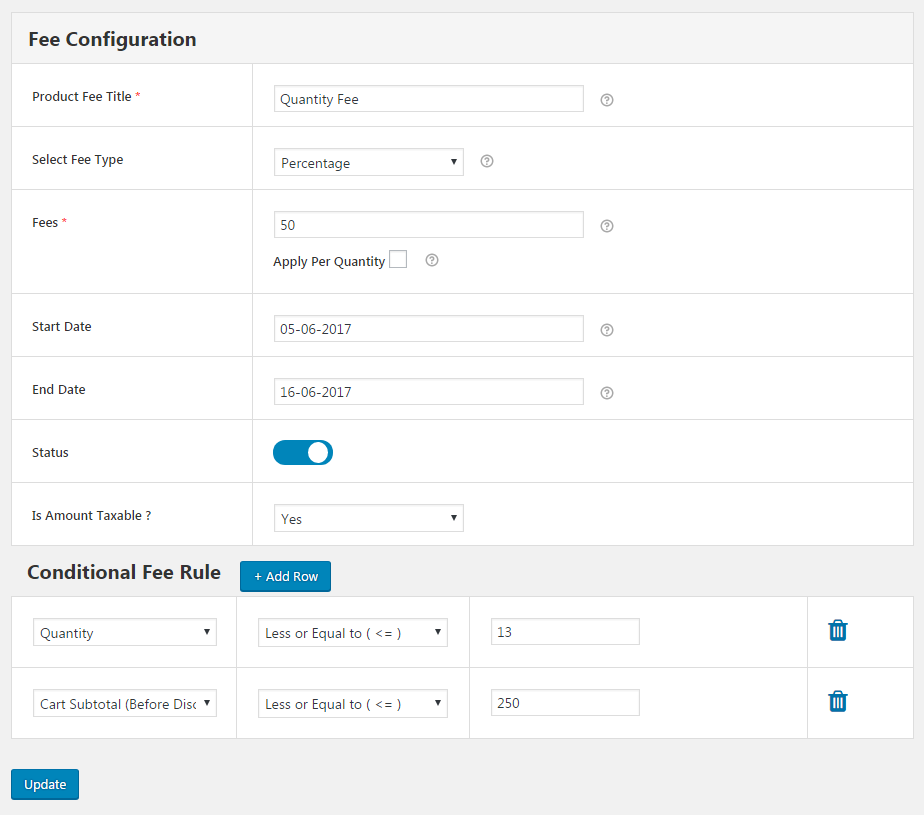
- Status: The first tab is status and it indicates whether or not the current fee is live on the website. For now, we will toggle this to show that the fee is active.
- Product Fee Title: Next, you need to add a title for the product fee. This will help you identify which rule is created for what situations.
- Select Fee Type: When setting up additional fees, you can either set a standard rate or a percentage-based model. The fee type is to notify if you are applying the percentage based model or a fixed price.
- Tooltip Description: Add significant information about the fees, why do you need one and where would it be applicable.
- Start Date/End Date: In case, the created product fee is applicable for a given period of time or it is part of a seasonal offer, you can start and stop date for the same. The plugin would automatically rescind its application once the date ends.
- Is The Amount Taxable: Finally, you get the freedom to decide whether the said amount of tax-free or would be taxed and then added to the checkout page.
All of these are the basic settings or details that you would need to fill in, every time you create an additional product fee rule for your WooCommerce store. But where is the rule? The above-mentioned aspects suggestions what to apply but nothing about when?
Scroll down and you will find a tan as Conditional Fee Rule. This is where we will create rules to implement the additional fees.
Case One: Add $25 when shipment country is outside America.
To create this rule, you would need to first fill in the details as above. To create the rule, select the country in the first drop-down. Now, we need the rule to apply when the country is anything but America. So, in the next field, we select not equal to. Finally, in the last box, we pick America.

This way, an additional shipping cost of $25 would be levied when the country of the buyer is outside America.
Case Two: Add 10% of the cart value when the payment method is PayPal and cart value is less than $200
This is a different case as we have two different conditions. The beauty of the plugin is that it allows you to add more than one rule when creating the product fee. To apply the above, you would first need to set the fee type to percentage-based and enter 10% as the value.

Next, under the rules section, we will first select the cart value and then less than in the second box and enter $200 in the final field. For the second rule, click on the plus icon to add another column. Here, in the first field, select the payment method. Next, select equal to and then, type PayPal.

Click on save settings to apply the changes made by the plugin.
Following a similar method, you can add as many rules as needed.
Conclusion
Businesses, when trying to serve the customers well, must add all the needed functionality to their WooCommerce store. And, if your store has products that require extra fee, make sure to enable the WooCommerce Extra Fees Plugin for your e-commerce shop. For sure, it will help you out in carrying out the operations smoothly. In case you have any queries related to the same, please ask us by commenting below.
WooCommerce Extra Fees
Make profits from every confirmed sale through smart, conditional fees.
14-day, no-questions-asked money-back guarantee.

